Page 5 of 7
Re: Old dirty r69 - from basket to bike.
Posted: Wed Jul 29, 2020 12:01 pm
by CWRoady
Appreciate this thread and what you are doing with your bike. I am currently refurbishing my '55. The frame has a dent in the downtube below the steering head where the Earls front end mated with it (along with one on the left back from a Brown side stand I have been told). The front axel didn't slide in as smoothly as I felt it should either. I anticipate getting the frame and forks back from the frame shop soon, so yesterday I was boxing up the additional parts I plan to take for powder coating. Your latest posts motivated me to disassemble the horn and take it in as well. Thanks for the motivation and sharing your journey.
Re: Old dirty r69 - from basket to bike.
Posted: Fri Jul 31, 2020 11:57 am
by frostman48
If you don’t have it already, I recommend that you get a copy of The Barrington Motor Works ‘BMW /2 Motorcycle Restoration and Service Manual’. It is well worth it.
Re: Horn Adjustment.
Posted: Sat Aug 01, 2020 10:30 am
by wa1nca
[quote=wa1nca post_id=74145 time=1595967263 user_id=6496]
Picture are good now
I have 2 of the same horn
Dont adj the screw in the back
The adjustment is the screw on front and locks in place when the nut is tightened
The Bosch HO/FDF is a great horn, very loud
Tommy
[/quote
Did you get your horn working
Tommy
Adjustment Overkill?
Posted: Sat Aug 01, 2020 6:34 pm
by goaarongo
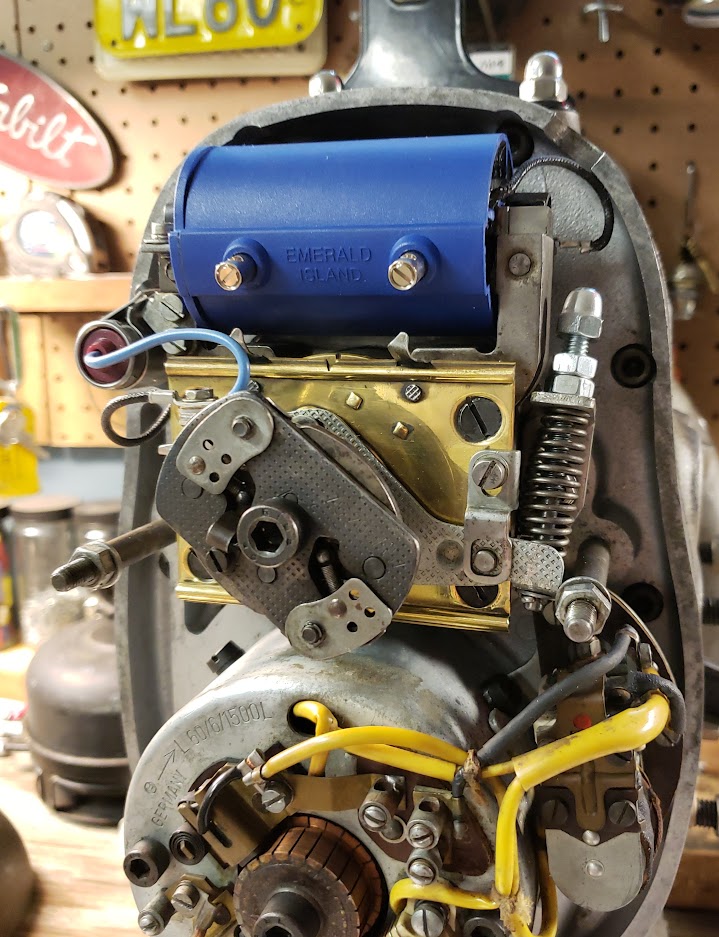
Tommy - horn is beeping now - thanks. I just had to crank that front screw down further than expected.
Frostman - I've heard a lot about that book - man it's pricey though. I've accumulated a lot of literature and pretty much have everything I need at this point - but I do hope to check that book out one day. Seems to be the gold standard.
CW - Thanks for the kind words. Glad you got your horn sorted as well.
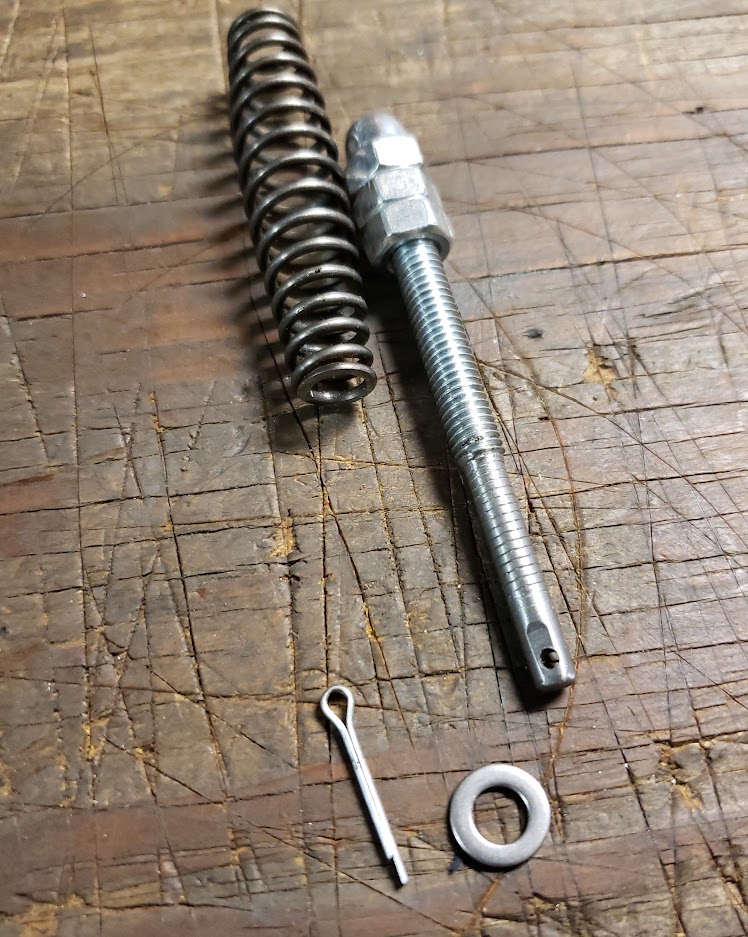
I'm kinda hanging out waiting on my top end work to come back now. I was looking at the spark advance and thought it would be nice to have an adjuster there, since I don't plan to hook up the cable. I made up this little guy - which may have been a bit overkill. I really only needed one nut on it for example, since the holder is already threaded. Originally I was just going to put another acorn on the bottom - but there wasn't really room for it. Ended up going with a cotter pin. I'll use it once probably to fine adjust and then lock it all in place.
Hope the machine work comes in soon - I'm getting antsy.
73.00 mm
Posted: Mon Sep 14, 2020 8:47 pm
by goaarongo
New piston day. Got my jugs back from the machine shop and they look great. 2nd overbore with new pushrod tubes.
Installed my filter and oil pan 1st, then put the rest together.


Exciting moment. I did slap one of those massive rare earth magnets Benchmark sells in the oil pan, which I forgot to take a picture of. The heads should be done soon - and I can't wait. I still find it a bit weird that the cylinder nuts don't use washers and the right side oil passage was never drilled. If I missed a thread somewhere about those two topics - I'd love to read them.
2 steps forward, 1 step back - Clutch Plate Thickness
Posted: Sun Oct 11, 2020 11:26 pm
by goaarongo
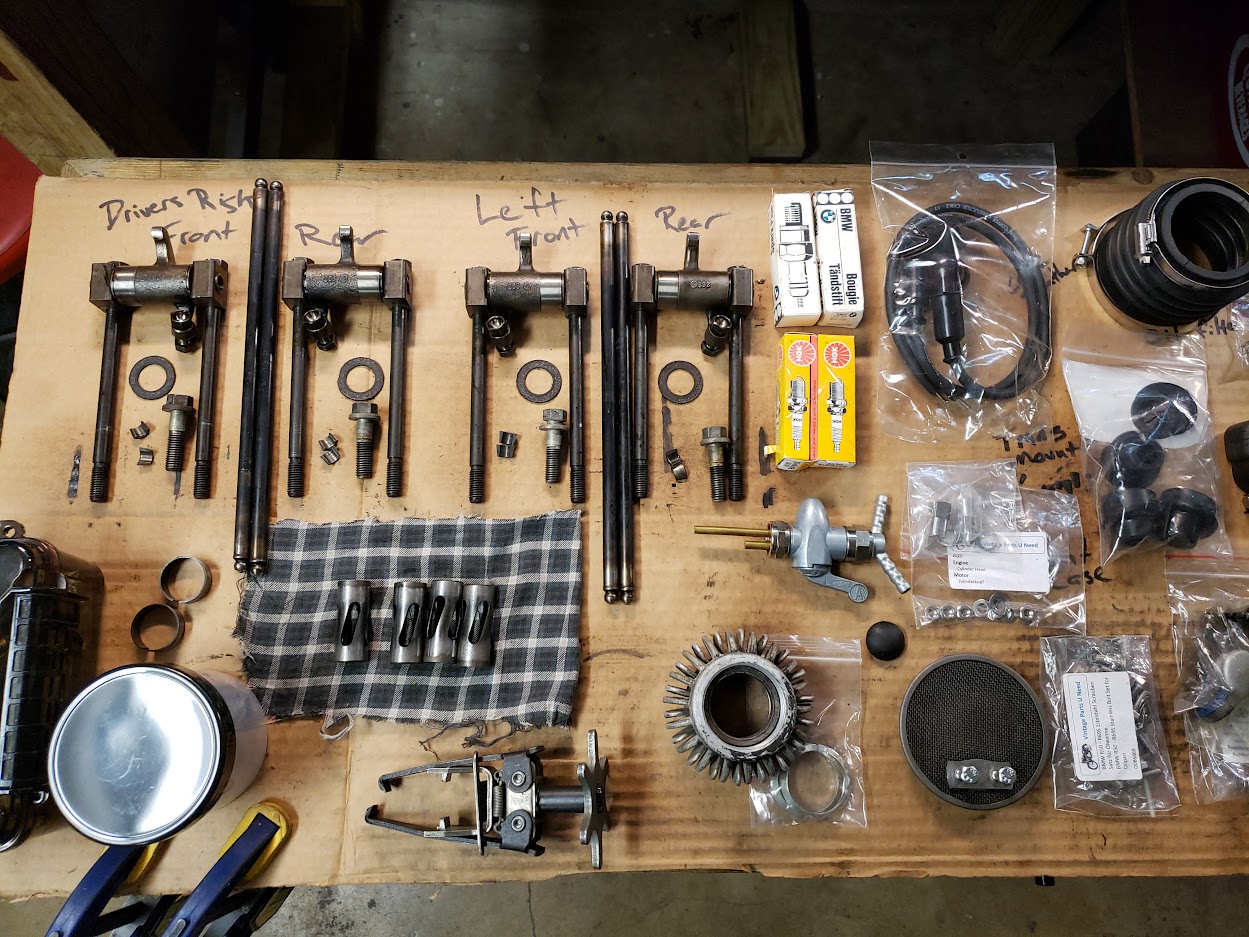
Got the heads back and I'm excited. With the time, effort and cash that went into overhauling these parts I almost feel silly I didn't do the 100% restore and blast and clean and repaint etc... oh well. I believe this can still be accomplished at a latter date if I ever get there - but for now I have left the "old & dirty" on the bike. Once I get it fully assembled, I'll pour a beer on it for that final touch. Heads mounted, torqued, gapped, gasketed and looking good.

I did this just to triple check all my timing marks are where they should be. Makes it easier to set the right side gaps too.

In all the excitement however, I did discover a tactical error I made quite a while back... Once I bolted on the transmission and tried to turn the bike over, I realized it was slipping through the clutch. This puzzled me as its all new, so I had to get some second opinions and hit the books again. Turns out in my early research I overlooked that there are 2 different clutch plates used on the r69. Seems obvious now, but I ordered the 5mil plate thinking it was correct when it turns out I needed the 9mil. My motor does have the spacer ring, and after looking further, Benchmark even has this notation on their website about the 5mm plate: "R69 to VIN 653875". My motor vin is after this... rookie mistake that's now resolved.


Once all that got sorted - the motor went into the frame. Landmark moment and there was much rejoicing.

Harvest Classic 18th Annual Rally
Posted: Sun Oct 11, 2020 11:30 pm
by goaarongo
I dearly love this event set in Luckenbach Texas, but for obvious reasons the big gathering aint happening this year. They are doing an online version, so I made this hokey video with a couple buddies to try and help them out.
Check out the event here:
http://www.harvestclassic.org/
Watch my kinda goofy r69 video here:
https://www.youtube.com/watch?v=9PezXxU ... MoreCoffee
My original plan was to video the motor going into the frame - but see clutch nonsense above...
Starting to look like a bike...
Posted: Sun Nov 01, 2020 9:27 pm
by goaarongo
Few steps closer... just waiting on carbs and then the final check list and tighten up.
Think I'm happy with my shiny / grungy look. These exhaust pipes are glorious.
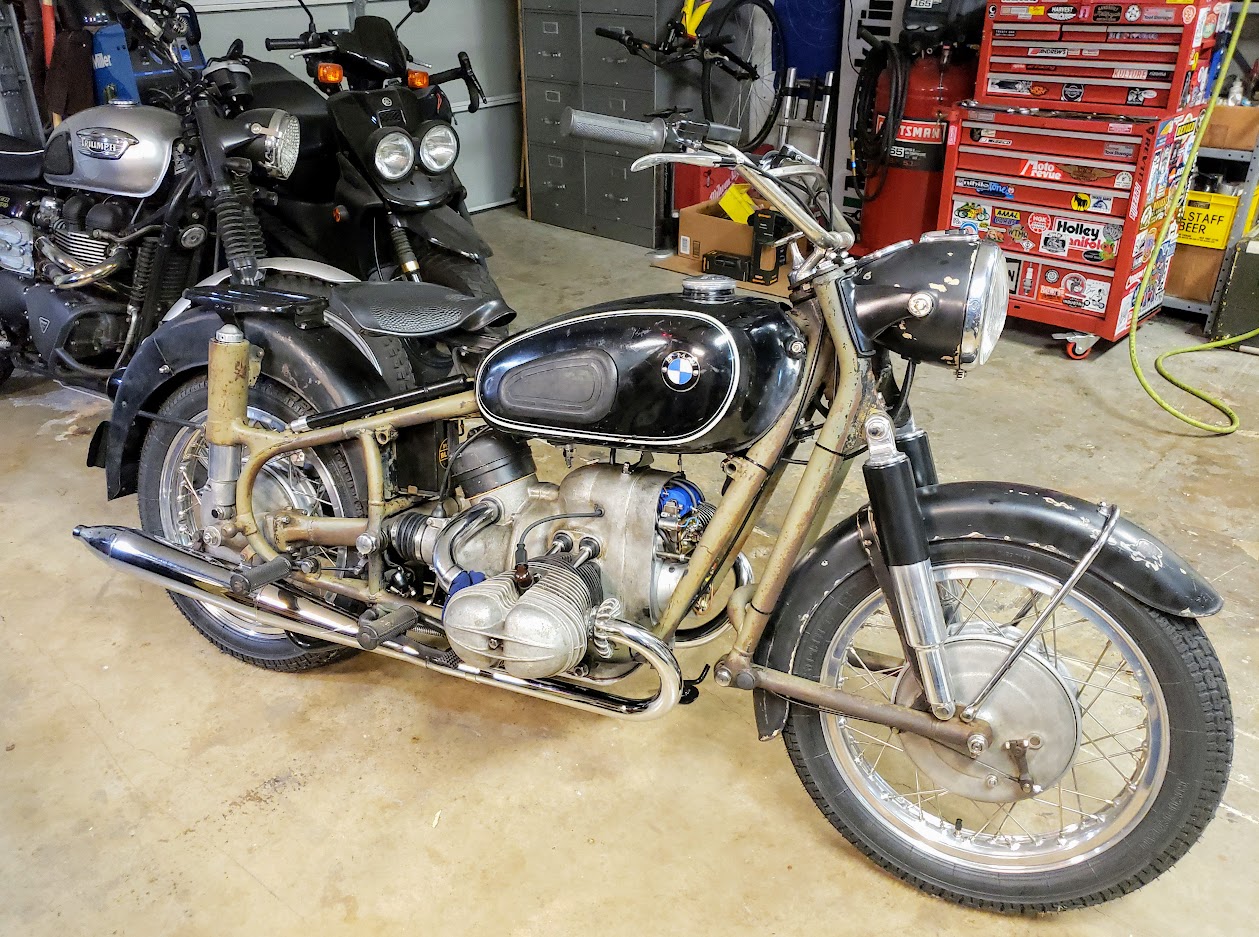

Dying to ride this thing.
Speedo knob from nothing.
Posted: Tue Nov 03, 2020 6:54 pm
by goaarongo
Took a page from Bikesmith01 and made a new knob for the one that missing from my speedo. Fiddly little job, and not as nice as his titanium one, but I'm happy with it.


Re: Old dirty r69 - from basket to bike.
Posted: Mon Nov 09, 2020 7:52 pm
by Slash2
Love the looks of this thing. Great thread!